In a previous post we looked at how to setup your Umbraco with uSync site so multiple developers can all work on the project using their own local install of the site. Now we are going to look at how we get that site onto some actual web servers.
Now the ‘simple’ way to get your site onto a server is to just copy your site files up to a live web-server change the connection string to point your live database and if you have uSync on the project all the other settings will be imported when the site starts up.
The only problem is this is that you have to be very careful when you copy any changes up, making sure you include all changed files and settings you might have made.
In all likelihood if you follow this approach for a production website you will quickly reach the point where your site setup isn’t quite the same as the site in your source control and deploying changes becomes painful and fraught with worry.
Publish from Visual Studio
One thing you might have noticed is that you can publish your website right from Visual Studio:

Right click on your solution and select publish and you get the publish dialog
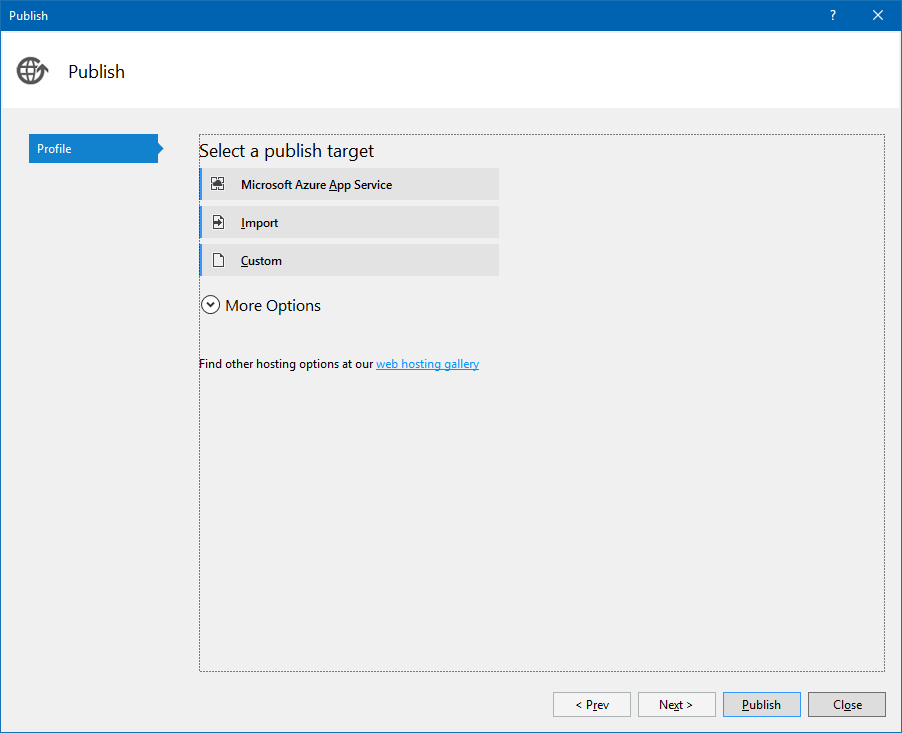
As you can see from here you can deploy straight to Azure, or local disk or an IIS Webserver.
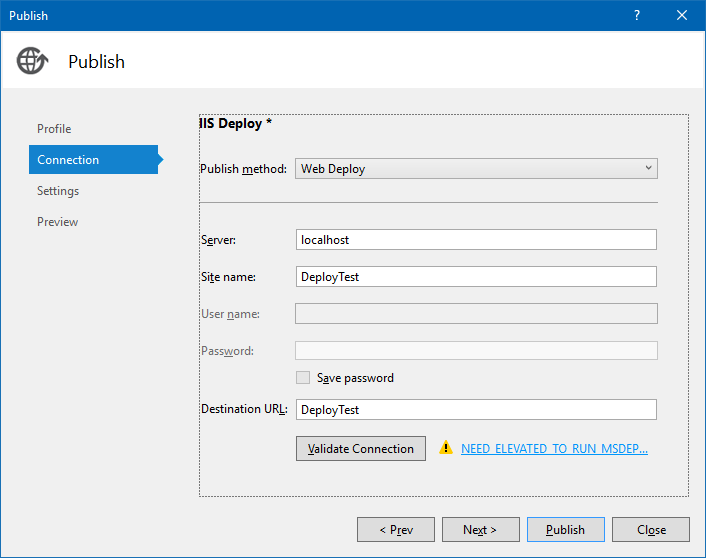
Here we are deploying to a site on our local machine (DeployTest) and you will notice that we are being told we need Elevated Privileges to run MsDeploy. For testing you can just run Visual Studio in Administrator Mode, but there are ways to delegate privileges so you don’t have to do this to your servers. [https://blogs.msdn.microsoft.com/amol/2011/02/09/allowing-non-admin-users-to-deploy-web-applications-on-iis-7-using-web-deploy-2-0/]
File Publish Options
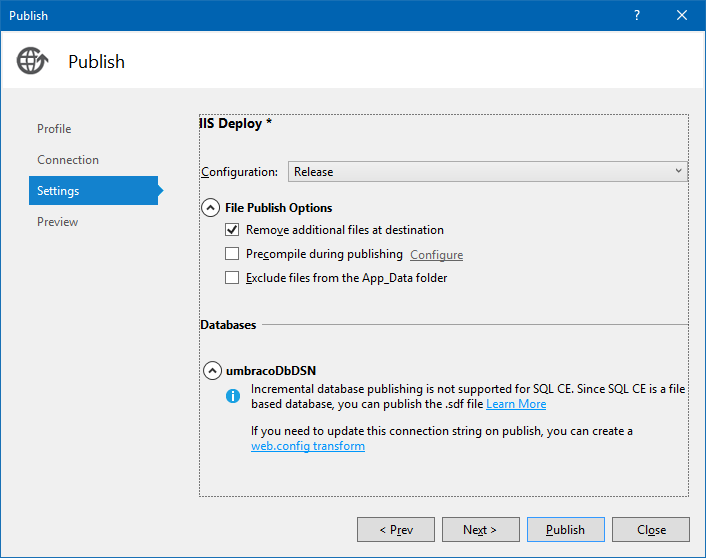
Here you need to consider how you are going to handle the database on you site
If you have done all you development locally with a SqlCE database, then you will get the big warning telling you that you can’t deploy the database. But that’s ok - because we don’t actually want to deploy our database, uSync is going to handle all database changes for us.
During publish visual studio will replace the connection string within your project with the one you specify in the config. You can do this with transform files on your web.config (so for example web.release.config) but for simplicity we are using the dialog for now
Publish
Once you have done this, you can preview and publish your site
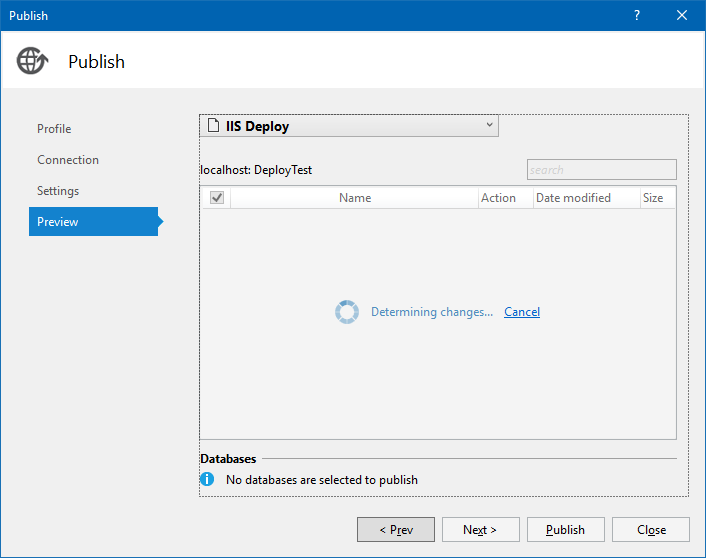
When you publish Visual Studio will build your site, copy the files to a publish location and then contact the web server and push any changes to it.
First Time Server
The first time you deploy with this method you won’t get an complete umbraco site. This is because you don’t have an database with umbraco initialized. But there are a couple of ways to fix that:
Remove the version number and DSN from the server web.config
Removing the version number from the server web.config will cause Umbraco to run through the install again and quickly setup the database, given that this is your first install you will get a blank database, and any other changes will be put on by uSync.
Stage the DB locally
My preferred method, is to quickly stage the DB with a local install. If you remove the DSN and Version number from your local web config, and startup the site, you will go through the install.
During the install - point umbraco to what will be your deployed database, this will generate the UmbracoDSN value. You need.
Move this UmbracoDSN value into your deployment setup or transform file
Scripting the deployment ?
With this setup we can go from our local machine to our web server in a repeatable and predictable way, but it still requires you to trigger the process from your development machine. What would be great would be if we could get some other system to build our site and push it to our web servers and so in our next post we’ll cover build servers and scripting deployments.